
Natural stone backsplash guide for elegant renovations

Choosing a backsplash that balances durability with timeless beauty can feel overwhelming. You want something that stands up to daily kitchen or bathroom use while adding elegance to your space. Natural stone backsplashes deliver both, offering unique textures and colors that transform ordinary walls into stunning focal points. This guide walks you through selecting the right stone, preparing your space, installing with confidence, and maintaining that polished look for years. Whether you’re tackling a full kitchen remodel or refreshing a bathroom, you’ll find practical steps to achieve professional results without the guesswork.
Table of Contents
- Key takeaways
- Preparing for your natural stone backsplash project
- Step-by-step natural stone backsplash installation
- Caring for and maintaining your natural stone backsplash
- Explore natural stone options and support for your project
- Frequently asked questions
Key Takeaways
| Point | Details |
|---|---|
| Stone and tool selection | Choose a stone type that fits your lifestyle and gather the correct cutting, adhering, and finishing tools before starting. |
| Surface prep matters | Prepare the wall thoroughly and select mortar formulated for natural stone to ensure a durable bond. |
| Plan and install carefully | Plan the layout by dry fitting and measuring before applying adhesive to avoid misaligned joints. |
| Maintenance matters | Establish a maintenance routine that includes cleaning and periodic sealing to preserve color and durability. |
Preparing for your natural stone backsplash project
Before you order materials or pick up tools, assess your space carefully. Measure the backsplash area in your kitchen or bathroom, accounting for height, width, and any obstacles like outlets or windows. Check the wall surface for damage, moisture issues, or uneven areas that need repair. A solid foundation makes installation smoother and prevents costly mistakes later.
Natural stone comes in several varieties, each with distinct characteristics. Popular natural stone options include marble, granite, limestone, and travertine, each offering unique aesthetics and durability. Marble brings classic elegance with veining patterns but requires more maintenance. Granite offers exceptional hardness and stain resistance, ideal for busy kitchens. Limestone provides softer tones and a matte finish, while travertine delivers rustic charm with natural pitting. Consider your lifestyle and how much maintenance you’re willing to handle.
Gathering the right tools and materials upfront saves frustration mid-project. You’ll need specific items for cutting, adhering, and finishing your backsplash. Here’s what to have ready:
- Tile saw or wet saw for precise cuts
- Notched trowel for spreading adhesive
- Level and spacers for alignment
- Grout float and sponges for finishing
- Safety gear including goggles and gloves
- Measuring tape and pencil for layout
| Material | Purpose | Quantity guidance |
|---|---|---|
| Natural stone tiles | Primary backsplash surface | Measure area plus 10% extra |
| Thin-set mortar | Adhesive for stone | Follow manufacturer coverage rates |
| Grout | Fill spaces between tiles | Calculate based on tile spacing |
| Sealer | Protect stone from stains | Enough for 2-3 coats |
| Backer board | Wall reinforcement if needed | Match backsplash dimensions |
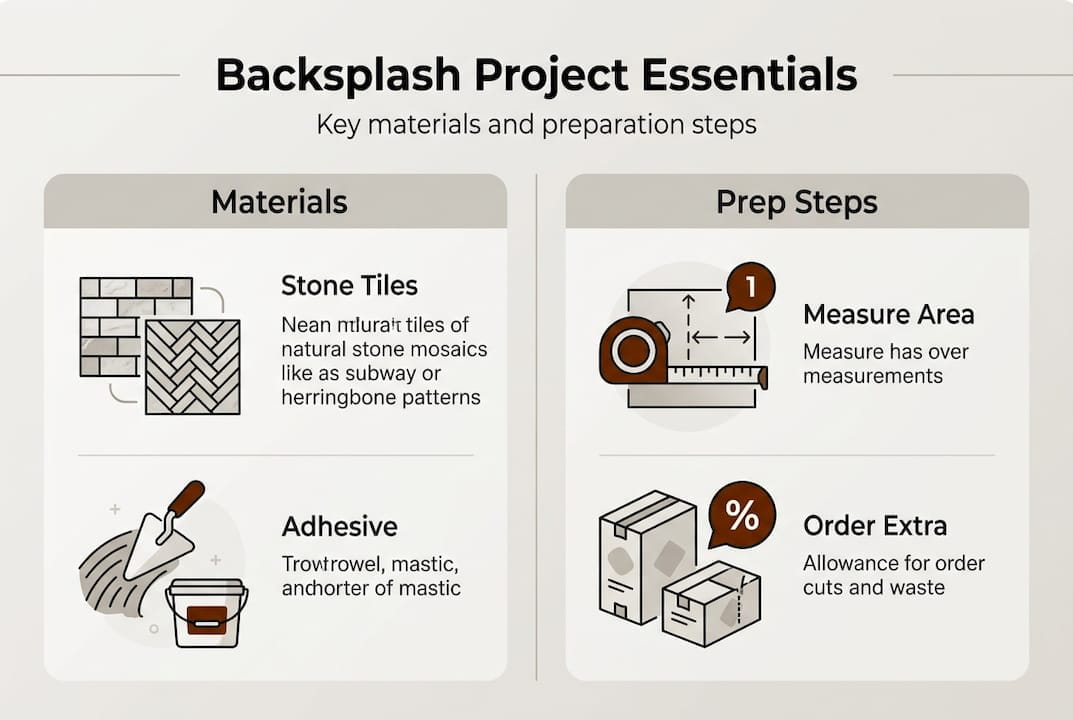
Pro Tip: Order 10 to 15 percent more stone than your measurements indicate. Natural stone can chip during cutting, and having extra ensures you can match patterns or replace damaged pieces without ordering new batches that might vary in color.
Plan your layout before mixing any adhesive. Dry-fit tiles on the wall or floor to visualize the pattern and identify where cuts will fall. This preview helps you make design decisions about centering, spacing, and how to handle corners or edges. Take photos of your preferred layout to reference during installation.
Step-by-step natural stone backsplash installation
Start with a spotless work surface. Remove any existing backsplash material, then clean the wall thoroughly to eliminate grease, dust, or residue. Sand glossy painted surfaces to improve adhesion. If the wall has significant damage or isn’t perfectly flat, install cement backer board for a stable base. Let any repairs cure completely before proceeding.
Select mortar specifically formulated for natural stone. Standard thin-set can stain lighter stones, so verify the product is suitable. Mix the mortar according to package directions, achieving a peanut butter consistency that holds peaks without being too stiff. Only mix what you can use in 20 to 30 minutes to prevent premature drying.
Following precise installation steps and techniques helps avoid common mistakes like uneven surfaces or weak adhesion. Here’s the systematic approach:
- Mark a level starting line on the wall using a laser level or straight edge
- Apply mortar to a small section (about 2 feet square) using the notched trowel
- Press the first tile firmly into place along your starting line
- Insert spacers between tiles to maintain consistent grout lines
- Continue placing tiles, checking level frequently with your tool
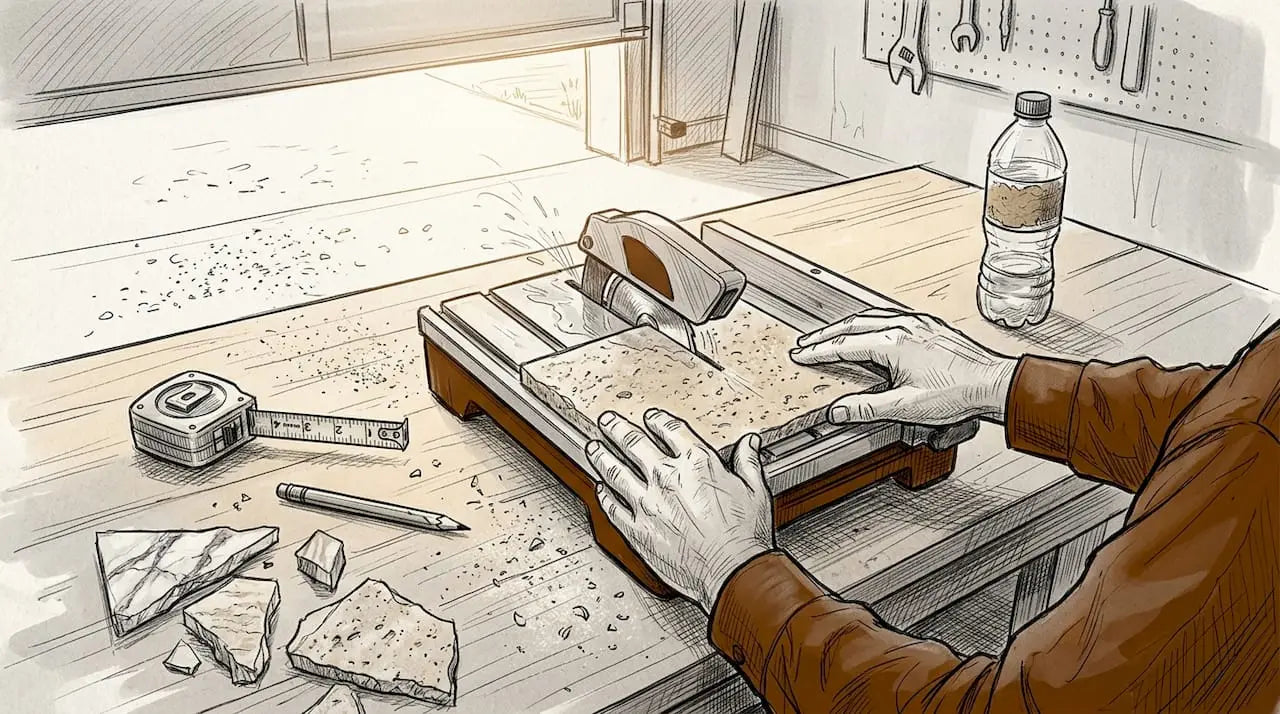
- Cut tiles as needed for outlets, edges, or corners using the wet saw
- Let the mortar cure for 24 to 48 hours before grouting
- Mix grout and apply with the float, pressing into joints at a 45-degree angle
- Wipe excess grout with a damp sponge, rinsing frequently
- Buff away haze after grout begins to set (about 20 minutes)
Cutting stone requires patience and the right technique. Measure twice before each cut, marking the back of the tile with a pencil. Use a wet saw with a diamond blade designed for natural stone. Feed the tile slowly through the blade, letting the tool do the work rather than forcing it. Wear safety goggles and keep the water reservoir full to minimize dust and prevent blade overheating.
Common installation challenges have straightforward solutions. If tiles aren’t sticking properly, the mortar may be too dry or the wall surface inadequately prepared. Lippage (uneven tile edges) happens when you don’t check level constantly or when mortar thickness varies. Fix it immediately by removing the tile, adjusting mortar, and resetting. Grout that cracks usually indicates joints that are too narrow or mortar that hasn’t fully cured.
Pro Tip: Work in sections no larger than what you can tile in 15 minutes. This keeps the mortar workable and lets you adjust tiles before adhesive sets. If you spread too much mortar at once, it will skin over and lose bonding strength, leading to tiles that pop off later.
Pay special attention to corners and edges. Inside corners can use trim pieces or carefully mitered cuts for a seamless look. Outside corners benefit from bullnose tiles that provide a finished edge. Around outlets and switches, turn off power and remove cover plates before tiling. Cut tiles to fit snugly around electrical boxes, leaving just enough space for covers to reattach.
Caring for and maintaining your natural stone backsplash
Proper sealing, regular cleaning, and avoiding harsh chemicals significantly extend the lifespan and appearance of natural stone backsplashes. Sealing creates a protective barrier against stains, moisture, and everyday wear. Apply sealer 48 to 72 hours after grouting, once everything has cured completely. Use a sealer formulated for your specific stone type, following application instructions precisely. Most natural stones need resealing every 6 to 12 months, though high-traffic kitchen areas may require more frequent treatment.
Daily cleaning keeps your backsplash looking fresh without damaging the stone. Use warm water and a soft cloth for routine maintenance. For deeper cleaning, choose pH-neutral cleaners specifically designed for natural stone. Avoid acidic products like vinegar, lemon juice, or standard bathroom cleaners, which can etch and dull the surface. Never use abrasive scrubbers or harsh chemicals that strip the sealer.
Here are essential maintenance practices:
- Wipe up spills immediately, especially acidic liquids like tomato sauce or citrus juice
- Use cutting boards and trivets to protect stone from scratches and heat
- Test new cleaning products on an inconspicuous area first
- Reseal when water no longer beads on the surface
- Address stains promptly with poultices designed for natural stone
- Inspect grout lines annually and repair any cracks to prevent moisture intrusion
Critical warning: Never use bleach, ammonia, or alkaline cleaners on natural stone backsplashes. These products break down the sealer and can permanently discolor or damage the stone. Always verify any cleaner is stone-safe before applying it to your backsplash.
Different stones have specific care requirements. Marble and limestone are more porous and sensitive to acids, demanding extra caution with food prep and cleaning products. Granite and travertine are more forgiving but still benefit from proper sealing and gentle cleaning. Learn your stone’s particular needs to tailor your maintenance routine.
Stains happen despite best efforts. For organic stains (coffee, food), use a poultice made from baking soda and water. Oil-based stains may require a commercial stone poultice. Apply the mixture to the stain, cover with plastic wrap, and let it sit for 24 hours before removing and rinsing. Repeat if necessary. Deep or stubborn stains might need professional restoration.
Grout maintenance matters as much as stone care. Sealed grout resists staining and moisture better than unsealed lines. Clean grout with a soft brush and stone-safe cleaner, avoiding harsh scrubbing that can erode the material. If grout becomes discolored or damaged, regrouting those sections restores appearance and protects the installation.
Explore natural stone options and support for your project
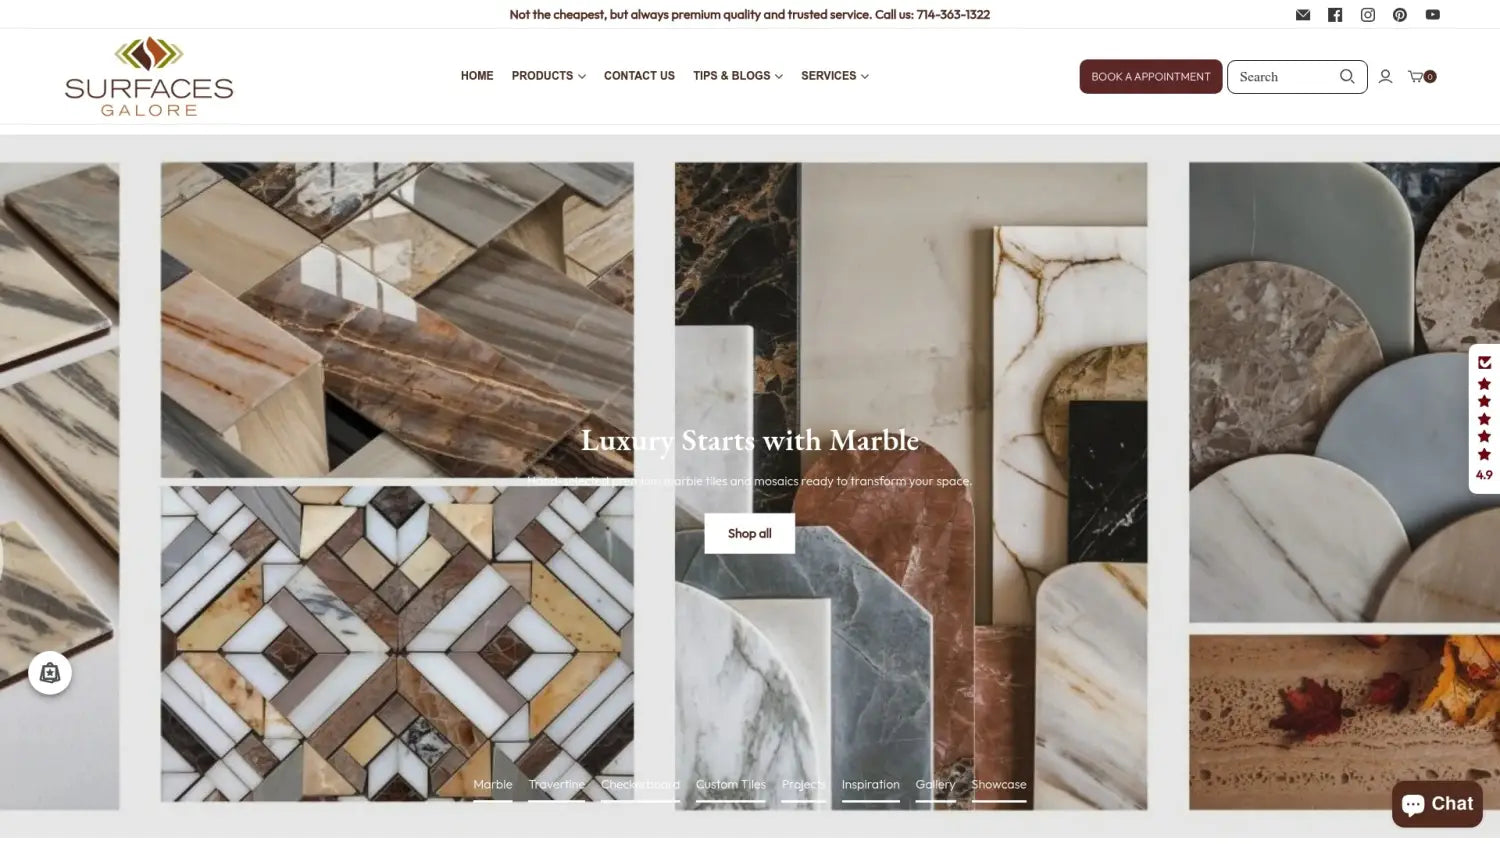
Surfaces Galore offers an extensive natural stone backsplash selection to match any design vision. From classic marble to rustic travertine, you’ll find premium materials that combine beauty with durability. Our direct import model means you get authentic natural stone at prices that respect your renovation budget.
Need guidance on installation techniques or choosing the right stone for your space? Our backsplash installation guide walks through every step, while our natural stone selection tips help you make informed decisions. We ship nationwide, bringing California quality to your doorstep wherever you’re located. Whether you’re a DIY enthusiast or working with a contractor, we provide the materials and expertise to ensure your project succeeds.
Frequently asked questions
How do I choose the best natural stone for my backsplash?
Consider both aesthetic preferences and practical maintenance requirements when selecting stone. Evaluate your kitchen or bathroom’s existing colors, lighting, and style to find complementary tones and textures. Think about your lifestyle too: busy kitchens benefit from harder, less porous stones like granite, while bathrooms with less exposure to acids can showcase softer marble beautifully. Consult a types of natural stone guide to compare hardness, porosity, and style options before committing to a material.
Can I install a natural stone backsplash myself or should I hire a professional?
DIY installation is definitely possible with careful planning, the right tools, and patience to follow proper techniques. Straightforward layouts with standard tile sizes work well for confident DIYers who’ve tackled similar projects. However, complex patterns, expensive rare stones, or intricate cuts around numerous obstacles may justify hiring a professional to avoid costly mistakes. If you’re uncertain, start with a small area or consider a backsplash DIY installation guide to build skills before tackling larger spaces.
How do I maintain and clean a natural stone backsplash?
Use pH-neutral cleansers designed specifically for natural stone, avoiding harsh chemicals, acids, or abrasive scrubbers that damage the surface. Wipe up spills immediately to prevent staining, especially acidic substances like tomato sauce or wine. Reseal your stone periodically (typically every 6 to 12 months) to maintain resistance to stains and moisture. For detailed care instructions tailored to your stone type, review natural stone care information that covers sealing, cleaning, and troubleshooting common issues.
What’s the typical cost range for natural stone backsplash materials?
Natural stone backsplash costs vary widely based on stone type, quality, and source. Basic travertine or limestone tiles might start around $8 to $15 per square foot, while premium marble or exotic granite can reach $50 to $100 per square foot or more. Factor in additional expenses like mortar, grout, sealer, and tools if you’re installing yourself. Professional installation typically adds $10 to $30 per square foot depending on complexity. Shopping directly from importers often provides better value than retail markup pricing.
How long does natural stone backsplash installation take?
A typical kitchen backsplash covering 30 to 40 square feet takes an experienced DIYer about two to three days, including prep work, installation, and grouting. The actual tile-setting might only take four to six hours, but you must allow 24 to 48 hours for mortar to cure before grouting. Add another day for grout curing and sealer application. Professional installers work faster, often completing similar projects in one to two days. Complex layouts, extensive cutting, or challenging wall conditions extend the timeline regardless of who’s doing the work.
Leave a comment