
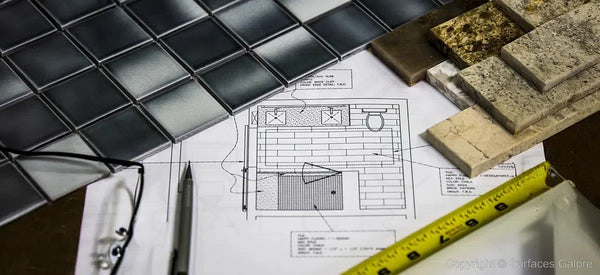
Choosing, Calculating, and Installing overview
How to Choose the Best Natural Stone for Your Home

Choosing the best natural stone for your house involves several considerations, including aesthetics, durability, maintenance, and suitability for the specific area where the stone will be installed. Here are some steps to guide you through the selection process:
1. Determine the Area of Installation:
-
Flooring: High-traffic areas like hallways and kitchens require durable stones.
-
Countertops: Needs to be resistant to stains and scratches.
-
Bathrooms: Should be slip-resistant and handle moisture well.
-
Outdoor Areas: Requires weather-resistant and durable stones.
2. Consider the Types of Natural Stone:
-
Granite: Extremely durable and resistant to scratches and heat, making it ideal for countertops and high-traffic areas.
-
Marble: Luxurious and elegant but more prone to scratching and staining. Best suited for low-traffic areas or decorative features.
-
Slate: Durable and slip-resistant, making it great for bathrooms and outdoor areas.
-
Limestone: Softer and more porous, providing a natural look but requires more maintenance. Suitable for low-traffic areas.
-
Travertine: A type of limestone with a distinct look, suitable for flooring and wall applications. Needs sealing.
-
Sandstone: Provides a rustic look, suitable for both indoor and outdoor use but needs sealing.
3. Evaluate Aesthetic Preferences:
-
Color and Veining: Natural stones come in a variety of colors and patterns. Choose a stone that complements your existing decor.
-
Finish: Polished, honed, tumbled, or brushed finishes can affect the look and feel of the stone. Polished stones are shiny and smooth, while honed stones have a matte finish.
4. Assess Durability and Maintenance:
-
Hardness: Stones like granite are harder and more durable, whereas marble and limestone are softer and more prone to scratches.
-
Porosity: More porous stones (e.g., marble, limestone) can stain more easily and require sealing. Less porous stones (e.g., granite) are easier to maintain.
-
Maintenance Requirements: Some stones need regular sealing and special cleaners. Consider how much maintenance you are willing to perform.
5. Consider Safety and Functionality:
-
Slip Resistance: For areas prone to moisture (bathrooms, kitchens), choose stones with a textured or honed finish to prevent slipping.
-
Heat Resistance: For kitchen countertops, select stones that can withstand high temperatures.
6. Budget:
-
Cost of Stone: Natural stones vary widely in price. Granite and marble tend to be more expensive, while slate and limestone can be more affordable.
-
Installation Costs: Factor in the cost of professional installation, which can vary based on the type of stone and the complexity of the project.
7. Sourcing and Sustainability:
-
Local Availability: Check what stones are available locally to reduce transportation costs and environmental impact.
-
Sustainable Practices: Look for suppliers who source stones responsibly and follow sustainable practices.
8. Seek Professional Advice:
-
Consult with a Designer: Interior designers can help you choose the best stone that fits your aesthetic and functional needs.
-
Visit Showrooms: Seeing the stones in person can help you better understand their appearance and texture.
9. Sample Testing:
-
Request Samples: Obtain samples of different stones and place them in the intended area to see how they look in different lighting conditions.
Summary Table:
|
Stone Type |
Durability |
Maintenance |
Best Use |
Cost |
|
Granite |
High |
Low |
Countertops, high-traffic |
High |
|
Marble |
Medium |
High |
Low-traffic, decorative |
High |
|
Slate |
High |
Medium |
Bathrooms, outdoor |
Medium |
|
Limestone |
Medium |
High |
Low-traffic, decorative |
Medium |
|
Travertine |
Medium |
Medium |
Flooring, walls |
Medium |
|
Sandstone |
Medium |
Medium |
Indoor/outdoor |
Medium-Low |
By considering these factors, you can select the best natural stone that fits your aesthetic preferences, functional needs, and budget.
The Waste Factor
How Much Do I Need to Order?
The best practice is to order at least 10-30% more than your project requirements to account for potential issues, waste due to cutting material, and other potential breakage during installation.
When installing natural stone, understanding the waste factor is crucial. The waste factor refers to the amount of stone that will be cut, trimmed, or otherwise discarded during the installation process. The waste factor varies depending on how tightly the stones are fitted; tighter joints require more trimming and thus produce more waste.
Waste Factor Considerations
-
Project Size: Larger projects might have a slightly lower percentage of waste due to more efficient use of materials.
-
Joint Tightness: Tighter joints increase the waste factor due to more precise trimming.
-
Stone Variations: Natural stones have variations in color and texture, necessitating extra materials to ensure consistency across the installation.
Example Calculation
For a project area of 1,000 square feet with an expected waste factor of 10% to 30%, you would need to purchase between 1,100 and 1,300 square feet of stone.
Tips for Managing Waste
-
Mock-Up: Create a small mock-up to better estimate your specific waste factor before ordering materials.
-
Order Extra: Always order extra materials for future repairs or additions, as natural stone batches can vary.
-
Efficient Cutting: Plan cuts carefully to minimize waste and use off-cuts in less visible areas.
By accurately calculating the waste factor and ordering extra material, you can ensure a smoother installation process and a consistent appearance of your natural stone veneer.
Installation Tips
Installing natural stone flooring can be a rewarding project, giving your home a luxurious and timeless look. Here's a step-by-step guide to help you through the process:
Materials and Tools Needed:
-
Natural stone tiles (marble, granite, slate, etc.)
-
Tile adhesive (thin-set mortar)
-
Grout
-
Tile spacers
-
Notched trowel
-
Level
-
Tape measure
-
Tile cutter or wet saw
-
Rubber mallet
-
Sponge and bucket
-
Grout float
-
Sealer (specific to your type of stone)
-
Safety equipment (gloves, goggles, knee pads)
Step-by-Step Guide:
1. Preparation:
-
Measure the Area: Calculate the square footage of the area where you plan to install the tiles.
-
Prepare the Subfloor: Ensure that the subfloor is clean, dry, and level. If necessary, apply a self-leveling compound.
-
Acclimate the Tiles: Let the stone tiles sit in the installation area for a couple of days to acclimate to the room temperature and humidity.
2. Layout Planning:
-
Dry Lay the Tiles: Lay out the tiles without adhesive to plan the pattern and placement. Start from the center and work your way out to ensure an even layout.
-
Mark Guidelines: Use a chalk line to mark the center of the room and create reference lines for laying the tiles.
3. Applying Adhesive:
-
Mix the Thin-set Mortar: Follow the manufacturer's instructions to mix the mortar.
-
Spread the Mortar: Using the notched trowel, spread the thin-set mortar on a small section of the subfloor. Hold the trowel at a 45-degree angle to create ridges in the mortar.
4. Laying the Tiles:
-
Place the Tiles: Press the tiles into the mortar, twisting them slightly to ensure a good bond. Use tile spacers to maintain consistent gaps between the tiles.
-
Check for Level: Regularly check that the tiles are level and adjust as necessary using the rubber mallet.
5. Cutting Tiles:
-
Measure and Mark: Measure the tiles that need to be cut to fit along the edges and mark them.
-
Cut the Tiles: Use a tile cutter or wet saw to cut the tiles to the required size.
6. Grouting:
-
Allow Adhesive to Cure: Let the adhesive dry for at least 24 hours or as recommended by the manufacturer.
-
Mix the Grout: Mix the grout according to the instructions.
-
Apply the Grout: Using a grout float, apply the grout diagonally across the tiles to fill the gaps. Remove excess grout with the float.
-
Clean the Tiles: Use a damp sponge to wipe off excess grout from the tile surfaces. Rinse the sponge frequently and be careful not to remove grout from the joints.
7. Sealing:
-
Allow Grout to Cure: Let the grout cure for the recommended time, usually 48-72 hours.
-
Seal the Tiles: Apply a stone sealer to protect the tiles from stains and moisture. Follow the manufacturer's instructions for application and curing times.
8. Final Touches:
-
Clean the Floor: After the sealer has dried, give the floor a final cleaning to remove any residue.
-
Inspect the Installation: Check the tiles and grout lines for any imperfections and make any necessary repairs.
Tips:
-
Always wear safety equipment when cutting tiles.
-
Follow the manufacturer's instructions for all materials used.
-
Work in small sections to prevent the adhesive from drying out before the tiles are laid.
-
Regularly clean your tools to prevent the mortar and grout from hardening on them.
This guide should help you install natural stone flooring successfully. If you have any specific questions or encounter any issues during the installation, feel free to ask!
Maintenance and Installation
Introduction: Proper installation and maintenance are crucial for preserving the beauty and durability of marble and travertine – two elegant natural stone materials. These stones add timeless charm to any space, but they are also porous and require special care. Without the right installation techniques and upkeep, marble and travertine can develop issues like stains, scratches, or cracks
. By contrast, when installed correctly and maintained regularly, natural stone surfaces will remain beautiful for many years
. In this guide, we provide an overview of best practices for installing marble and travertine, essential accessories you’ll need, tips for ongoing care, and important resources. Our goal is to support your project’s success while helping you protect your investment in natural stone.
A professionally installed marble floor showcasing rich veining. Proper installation and care ensure a natural stone surface remains elegant and durable over time.
Installation Tips and Considerations for Marble & Travertine
Installing marble or travertine correctly from the start will help prevent future problems. Keep these tips in mind before and during installation:
-
Inspect Tiles Before Installation: Natural stone tiles often have variation in color and pattern, and may occasionally have imperfections. Always inspect each tile for cracks, chips, excessive warping, or other defects before installing, since laying a tile is usually considered acceptance of its quality
. If you have any doubts about a piece, set it aside or consult your supplier before it’s fixed in place. -
Plan Your Layout & Dry-Lay: It’s wise to do a dry layout of the tiles prior to using any adhesive. By arranging tiles on the floor (or wall) without mortar, you can verify the layout, avoid small or awkward cuts along edges, and ensure a pleasing distribution of color and veining
. Because marble and travertine are natural, their tones can vary; mixing tiles from different boxes and dry-laying helps blend color variation for the best overall look . During this planning stage, also determine your grout joint spacing (many marble installations use tight joints around 1/16–1/8 inch, but follow any specific product recommendations). -
Check Material Compatibility: Ensure that all setting materials (mortars, adhesives, grouts, etc.) and adjacent finishes are appropriate for natural stone. Use only products rated for marble/travertine. For example, avoid premixed mastic adhesives that may not be suitable for stone. Instead, choose a high-quality thin-set mortar that is formulated for natural stone
. In particular, if your stone is light-colored or translucent, use a white thinset mortar rather than gray, to prevent any bleed-through or discoloration of the tile . Always follow manufacturer instructions for any mortar or additive to ensure compatibility with your stone and substrate. If your project combines marble/travertine with other materials (metal trim, glass accents, etc.), verify that the installation products will adhere properly to all surfaces. -
Ensure a Solid, Level Substrate: Marble and travertine must be installed on a flat, stable surface. The subfloor or wall substrate should be clean, sound, dry, and level before you begin
. Any dirt, dust, grease, old adhesive, or contaminants must be removed, as these can prevent proper bonding . On floors, check for low or high spots and use a patch or self-leveling underlayment if necessary – natural stone tiles are typically thinner and can crack if installed over uneven surfaces. Additionally, the subfloor must be stiff with minimal flex (natural stone tile installations often require a stiffer subfloor than ceramic tile to support the weight and prevent cracking). If installing over wood subfloors, ensure proper underlayment (such as a cement backer board or uncoupling membrane) is in place per industry standards. It’s also recommended to install a crack-isolation membrane on concrete slabs to help prevent any substrate cracks from telegraphing into the stone . Taking time to prep the substrate will set a strong foundation for your stone tiles and avoid issues like tiles popping loose or cracking later . -
Use the Right Tools & Techniques: When you’re ready to set the tiles, use a notched trowel of appropriate size to apply your thinset mortar evenly
. Spread mortar on a small section at a time, combing it with the notched side of the trowel to create ridges. Press each marble or travertine tile firmly into the mortar with a slight wiggle to ensure full coverage and a good bond . It’s a good practice to occasionally lift a tile you just set to check that the mortar is adhering across the entire back (this prevents hollow spots under the stone). Insert tile spacers between tiles to maintain consistent grout joints and use a level to keep the installation flat (natural stone tiles are often ground flat, so you want to minimize “lippage” between pieces). If tiles are large format or heavy, consider using leveling clips/systems to help keep them flush with each other. Work in sections, and allow the mortar to cure fully (usually 24–48 hours) before proceeding to grouting . -
Cutting Stone Tiles: Marble and travertine can be cut with a wet saw equipped with a diamond blade. Take care to use a sharp, clean diamond blade specifically designed for stone to avoid chipping the edges
. Always cut slowly and steadily – rushing a cut is a common cause of chips or breakage in brittle stone . For safety and best results, wear proper protection (eye protection, gloves) and ensure the saw’s water feed is functioning to cool the blade and reduce dust. Plan your cuts to hide cut edges against walls or corners when possible. If any cut edges will be exposed in the finished design, you might need to sand or polish them for a smoother appearance. -
Grouting and Cleaning: Once the tiles are set and the mortar has cured, carefully remove spacers and prepare to grout. Choose the right grout type and color for your project. For polished marble and honed travertine with narrow joints, an unsanded grout is often recommended (sanded grout could scratch highly polished surfaces). Always verify on a test area if the grout color and type are suitable: some stones, especially lighter marbles and unfilled travertine, can be prone to staining or scratching during grouting
. It’s wise to do a small test or mock-up to ensure the grout doesn’t discolor the stone or get stuck in surface pores. Packing the grout fully into the joints is important – there should be no gaps or air pockets. Clean excess grout promptly as you work, wiping the stone surface with a damp sponge before the grout haze dries . Do not allow grout to harden on the face of marble or travertine, as it can be difficult to remove and may dull the finish. If you’re using a dark or contrasting grout color on a light stone, be especially diligent in cleaning to avoid pigment residue. -
Sealing Before and/or After Install: Marble and travertine are porous materials that benefit from sealing to reduce stain absorption. In fact, many installers pre-seal the stone tiles before grouting – applying a sealer to the tile surface (avoiding the edges) prior to installation or grouting can help prevent the grout or mortar from staining the stone
. This is an optional step but can be very useful for travertine (which often has open pores) or very light-colored marbles. If you choose to pre-seal, use a penetrating natural stone sealer (one that doesn’t leave a surface film) and allow it to dry fully before continuing . After grouting and final cleanup, it’s generally recommended to do a thorough seal of the entire surface. Once the grout has cured as per instructions (typically a couple of days), apply a penetrating sealer over the stone and grout to protect against water and oils . Remember that sealing reduces the stone’s absorbency but does not make it impervious to stains – you’ll still need to wipe up spills (more on maintenance below). Follow the sealer product’s instructions for application (usually applying evenly, letting it penetrate, then wiping off excess). Ventilate the area while sealing. This post-installation sealing will help ensure your marble or travertine is ready for everyday use.
Note: Always refer to industry standards (such as TCNA and Marble Institute of America guidelines) and manufacturer recommendations when installing natural stone
. If you are unsure about any step – from substrate preparation to choosing the right mortar or sealer – consider consulting a professional installer. Proper installation is critical to the longevity of marble and travertine surfaces, so taking the time to do it right (or hiring a qualified tile setter) is well worth it.
Essential Installation Accessories
When working with marble or travertine, having the right materials and tools on hand will make the installation smoother. Here are some essential accessories and products you’ll likely need:
-
Thinset Mortar: A high-quality, polymer-modified thinset mortar for stone (use white thinset for light-colored or translucent marble/travertine to avoid staining the stone
). This is the adhesive you will use to set the tiles. Check that the mortar is suitable for natural stone and for your substrate (e.g. some thinsets are labeled for stone or large-format tiles). -
Grout: Grout fills the joints between tiles and comes in different types. For most marble and travertine tiles, unsanded grout is used for joints up to 1/8" to avoid scratching polished surfaces, while sanded grout may be used for wider joints on tumbled or textured travertine (always follow the stone finish’s needs). Choose a grout color that complements your stone (do a small test to ensure the color is right and doesn’t stain the edges of the stone
). Epoxy or urethane grouts can offer stain resistance, but ensure they are compatible with natural stone (some epoxy grouts might yellow light marble or be very difficult to clean off porous travertine without pre-sealing). -
Sealer: A penetrating (impregnating) sealer designed for natural stone is crucial for protecting marble and travertine. Have a quality stone sealer on hand to apply after installation (and for periodic re-sealing during maintenance). As noted, you might also use the sealer to pre-seal tiles before grouting if needed
. Common reputable brands include those by Miracle Sealants, Aqua Mix, Dupont (StoneTech), etc. Make sure the sealer is appropriate for your particular stone finish (enhancing sealers will deepen color, whereas natural-look sealers won’t alter appearance). -
Tile Spacers: These small plastic spacers help maintain consistent gaps between tiles during installation
. For marble and travertine, which often have tight joints, you might use 1/16", 1/8" or 3mm spacers as required. Even if tiles are cut precisely, spacers ensure your lines stay straight and even. They come in various sizes; choose according to your desired grout line width. Remove spacers once the mortar sets, before grouting. -
Notched Trowel: An essential tool for spreading thinset. The notch size (e.g. 1/4"x1/4" square notch, 1/2" for large tiles, etc.) should match the tile size and the substrate flatness. This ensures the right amount of mortar is applied for full coverage. Using the proper trowel helps achieve a strong bond with no voids under the stone
. -
Grout Float and Sponges: A grout float (a flat rubber tool) is used to press grout into the joints, and sponges are used for cleaning off grout and haze from the tile surface. These aren’t unique to marble/travertine, but you’ll want non-abrasive sponges or cheesecloth for cleaning the delicate surface without scratching.
-
Leveling System (Optional): For larger format stone tiles, a tile leveling system (clips/wedges or spinning caps) can be very helpful to keep the tile faces flush with one another and minimize lippage. This is optional but can improve the finished quality on big marble or travertine tiles if used correctly.
-
Cement Backer Board / Underlayment: If installing on a wood subfloor or other unsuitable substrate, you will need cement backer board, an uncoupling membrane, or other approved underlayment for stone tile. This isn’t an “accessory” you see on the finished surface, but it’s a critical part of a successful stone installation. Ensure you have the proper base to set your marble or travertine (e.g. a cement board like HardieBacker, properly screwed down and taped at seams, or a membrane like Schluter®-DITRA for stone floors) as recommended for your application.
-
Diamond Blade Wet Saw: While not a consumable accessory, a tile wet saw with a diamond blade is usually necessary to cut marble or travertine tiles cleanly
. If you’re DIYing, you may rent one or purchase an appropriate blade for your saw. Other cutting tools like a manual tile cutter typically don’t work well on stone. Also have a drill with diamond core bits if you need to cut holes (for plumbing, etc.). Always use water when cutting stone to reduce dust and blade friction.
Having these accessories ready will help you tackle the installation efficiently. Ensure all materials (mortar, grout, sealer) are within their shelf life and follow any mixing/application instructions from the manufacturer for best results.
Best Practices for Maintenance and Ongoing Care
Once your marble or travertine is installed, proper maintenance is essential to keep it looking its best. Natural stone, unlike man-made tiles, can be sensitive to certain cleaners and prone to etching or staining if not cared for. Here are key maintenance practices:
-
Seal the Stone Periodically: Even if sealed after installation, marble and travertine will require re-sealing on a regular schedule to maintain protection. The frequency depends on the type of stone, its usage, and the sealer used. As a general rule, seal high-use surfaces about every 6 to 12 months
. For example, travertine in a busy kitchen or shower might be sealed twice a year, whereas a low-traffic accent wall could be sealed annually or less. Perform a simple water drop test: if water no longer beads on the surface and instead soaks in darkening the stone, it’s time to reseal. When reapplying sealer, clean the stone thoroughly and let it dry for at least 24 hours, then follow the product instructions (usually applying evenly, letting it penetrate, and buffing off any excess). Note: Sealing helps resist stains but does not make the stone stain-proof . Continue to promptly clean spills even on sealed stone. -
Use Gentle, pH-Neutral Cleaners: For day-to-day or weekly cleaning, avoid harsh chemicals at all costs. Marble and travertine are calcium-based stones that can be damaged by acids and certain alkaline substances. Use only a mild, pH-neutral detergent or stone cleaner with water for routine cleaning
. Many stone supply companies offer pH-neutral cleaners specifically for natural stone, or you can use a few drops of a gentle dish soap in warm water . Apply with a soft mop or cloth. Do not use general household cleaners that contain acids (like vinegar, lemon, or citrus-based solutions) or alkalines like bleach or ammonia in strong concentration, as these can etch or dull the stone’s surface . Even “all-purpose” cleaners are often too harsh for marble. Abrasive cleaners or scrubbing powders are also unsafe – they can scratch the finish . When cleaning, a soft microfiber cloth or a non-abrasive mop is best, and change the water or cleaning solution frequently to avoid film or residue build-up . After washing, rinse the surface with clean water to remove any cleaner residue, and dry it with a soft towel to prevent water spots . -
Wipe Up Spills Immediately: This is one of the golden rules with natural stone. Marble in particular can be etched by acidic liquids (like wine, coffee, fruit juices, vinegar, tomatoes, etc.) and both marble and travertine can absorb oils or pigments if spills are left to sit
. If anything spills on the surface, blot it up right away with a soft cloth or paper towel – do not wipe aggressively, as that can spread the substance . After blotting, cleanse the area with a mild soap and water, then rinse and dry. Even water should not be allowed to pool on marble or travertine, as it can leave a mineral deposit or slight mark if it evaporates and the stone is unsealed . Prompt attention to spills will greatly reduce the chance of staining or etching your stone. -
Use Protective Measures: Preventive care will maintain your stone’s finish longer. In areas like countertops, always use coasters under glasses (especially for citrus juices, wine, soda – anything acidic)
. Also use trivets or hot pads under hot dishes or pans; while stone can handle heat, sudden temperature changes or very high heat can sometimes cause thermal shock or discoloration . For floors, place doormats or rugs at entrances to trap dirt and grit that would otherwise be tracked onto the stone and scratch it . Use runners or area rugs in high-traffic zones. Felt pads under furniture legs are a must on marble/travertine floors – this prevents scratching when furniture is moved . Avoid dragging heavy objects across stone floors; lift and carry them or use a dolly with rubber wheels. In bathrooms, consider using a squeegee on marble or travertine shower walls after each use to minimize soap scum and hard water deposits. Little habits like these go a long way in preserving the polish and clarity of your stone. -
Routine Cleaning Practices: Sweep or dust mop stone floors frequently (sand or grit on the floor can act like sandpaper underfoot)
. A clean, untreated dry dust mop is ideal for picking up grit without scratching . If vacuuming, ensure the vacuum head or wheels are not worn or rough, as they could scratch the stone . Damp-mop or wipe surfaces with your pH-neutral cleaner as needed – many homeowners do this about once a week in kitchens or main areas. For travertine with texture or pits, make sure dirt isn’t accumulating in the indentations; vacuuming with a brush attachment can help in those cases. In showers, besides squeegeeing, use a stone-safe cleaner periodically to remove any soap film – avoid regular shower cleaners unless labeled safe for stone, as many are acidic. -
Avoid Harsh Chemicals: It bears repeating – no acidic or abrasive cleaners on marble or travertine
. Also avoid any product that says it’s a lime scale remover or contains vinegar, as well as bleach (small, heavily diluted amounts of bleach can be used in some cases like outdoor stone or for algae, but generally it’s not recommended for polished marble). If disinfection is needed, use a stone-safe disinfecting cleaner or a mild hydrogen peroxide solution for light-colored stone (test first). Never mix chemicals (e.g., bleach and ammonia) as this can create toxic gas – generally just stick to neutral pH cleaners. Additionally, do not wax marble or travertine unless advised by a stone professional. Waxes can build up and yellow, and they aren’t necessary if the stone is properly polished and sealed. Instead of wax, periodic professional polishing can be done if the shine needs to be restored on polished marble. -
Addressing Stains or Etching: If you do get a stain, there are specific methods to remove them depending on the type (oil-based, organic, rust, etc.). A common DIY method for many stains is using a poultice – for instance, a paste of baking soda and water can help draw out some stains from marble
. Spread the paste on the stain, cover with plastic wrap (with a few holes poked), let it sit for 24 hours, then gently remove and rinse. This may need repeating. Etch marks (dull spots from acid) on marble are a different issue – since etching is actually surface damage, it might require polishing to restore the shine. Light etch marks can sometimes be buffed out with a marble polishing powder (following product directions), but deep etches or scratches likely need professional refinishing . For travertine, honed finishes may hide etches a bit better, but the same approach applies. When in doubt, consult a stone restoration specialist for any major stain or damage. -
Maintain Grout Lines: The grout between stone tiles also needs care. Seal your grout along with the stone, as unsealed grout can readily absorb dirt and stains. Clean grout with a soft brush and the same pH-neutral cleaner you use for the stone
. Avoid using harsh grout cleaners or any acid on grout (acids can actually etch cement-based grout as well as the stone). If grout becomes heavily soiled or moldy (in showers), there are stone-safe grout cleaners available, or you can use a very dilute bleach solution for brief contact followed immediately by rinsing – but again, only on honed stone and as a last resort, since it can lighten the stone’s color if misused. Regular cleaning and keeping the stone surfaces dry will usually prevent grout issues.
By following these maintenance best practices, you’ll protect the natural beauty of your marble or travertine. A consistent routine of gentle cleaning, periodic sealing, and preventative care (like catching spills and using mats) will ensure your stone surfaces stay as stunning as the day they were installed
.
Disclaimer
-
Informational Use Only: The installation and maintenance tips provided here are for general informational purposes to help our customers. Surfaces Galore offers these guidelines as a courtesy to support your project, but they are not exhaustive professional instructions.
-
No Liability for Installation Outcomes: Surfaces Galore is not responsible for any installation issues, material incompatibilities, damages, or other results arising from the use of this information. Natural stone installation can be complex, and outcomes depend on many factors beyond our control (such as site conditions and installer skill). Always exercise due diligence and care during installation.
-
Verify Product Compatibility: It is the customer’s responsibility to ensure that all products (tiles, setting materials, sealers, etc.) are compatible and suitable for your specific application. When in doubt, consult the product manufacturer’s instructions or seek expert advice. Surfaces Galore cannot guarantee compatibility or performance of third-party products in your installation.
-
Consult Professionals as Needed: We strongly recommend consulting with certified tile installers, stone fabricators, or other qualified professionals for project-specific guidance. Every project is unique – factors like subfloor construction, environmental conditions, and intended use can affect the approach. Professional installers will be familiar with industry standards and can provide expertise tailored to your situation. Likewise, for maintenance concerns (such as deep cleaning or repairing stone), consider contacting a professional stone care specialist.
-
Surfaces Galore provides information to give customers an overview of the process from choosing to installation of our natural stone surfaces. However, we are not responsible for any mistakes, problems, or issues that may arise. All responsibility for the selection, installation, and any associated outcomes rests solely with the customers.