
Master the Travertine Tiling Process for Stunning Results

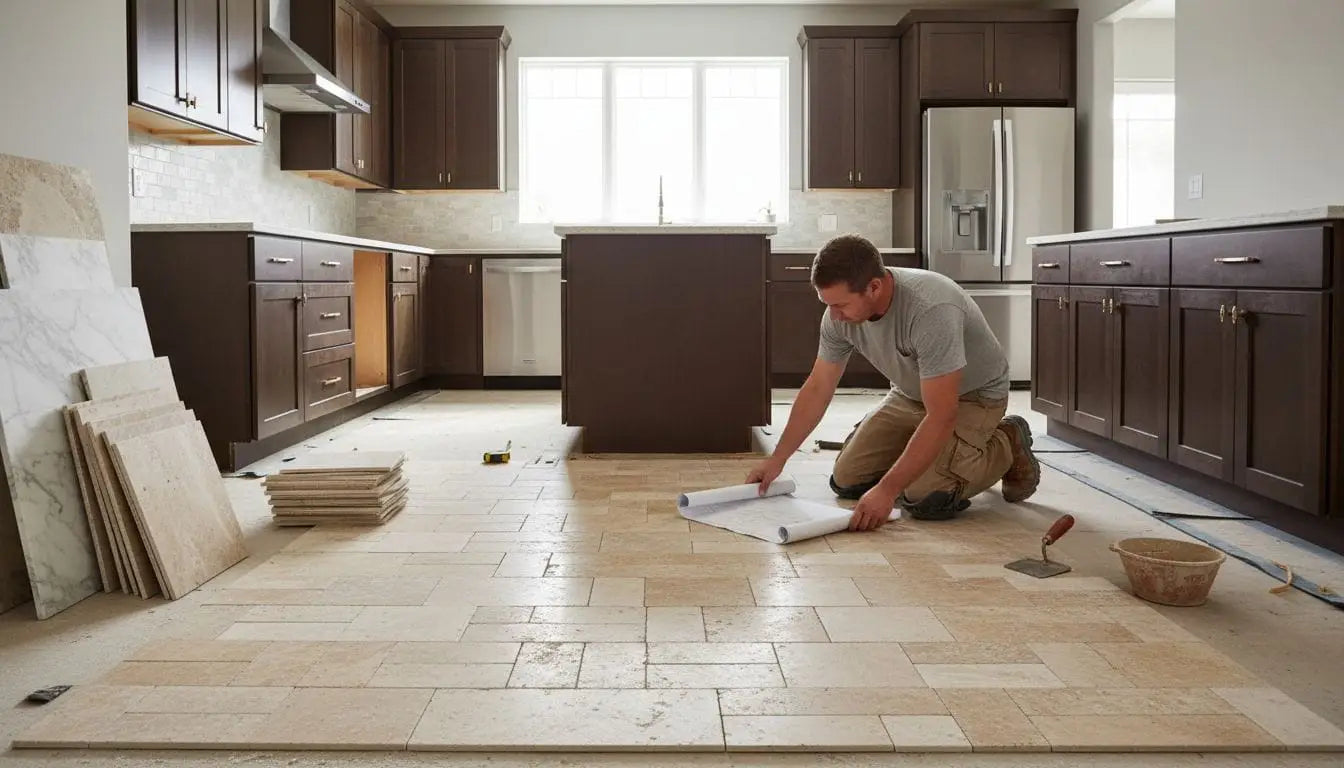
Did you know that improper tile installation can reduce your floor’s lifespan by as much as 50 percent? Travertine tiles create a stunning, timeless look but only if each step in the process is done with care. From preparing the surface to the final inspection, every detail counts for durability and beauty. This guide shows practical actions that make travertine tile installation successful and helps you avoid the costly mistakes many homeowners face.
Table of Contents
- Step 1: Assess And Prepare The Installation Surface
- Step 2: Select And Arrange Travertine Tiles
- Step 3: Apply Adhesive And Lay Tiles Precisely
- Step 4: Grout And Seal Travertine Surfaces
- Step 5: Inspect And Finalize Tiling Installation
Quick Summary
| Key Point | Explanation |
|---|---|
| 1. Ensure a Firm and Clean Surface | A stable, dry, and clean surface is essential for lasting tile installation. Inspect for damage and repair as needed before proceeding. |
| 2. Select Tiles with Careful Consideration | Choose tiles based on color blending and room dimensions to achieve a cohesive look. Create a dry layout to visualize the final design before installation. |
| 3. Use Quality Adhesive and Installation Techniques | Premium thinset mortar ensures strong adhesion. Apply it evenly and lay tiles methodically with proper spacing for optimal results. |
| 4. Properly Grout and Seal Tiles | Thoroughly grout joints, remove excess material, and apply a high-quality sealer for protection against stains and moisture. |
| 5. Conduct a Comprehensive Final Inspection | Check tile alignment, grout consistency, and adhesion quality to ensure a flawless finish and document the completed work for future reference. |
Step 1: Assess and Prepare the Installation Surface
Preparing your installation surface is the critical foundation for a successful travertine tile project. This step determines the longevity and aesthetic quality of your entire installation.
According to the Ceramic Tile Foundation, you must ensure the substrate is firm, dry, clean, and completely free from oil or waxy films. This means thoroughly examining and preparing your surface before any tiles are laid.
Start by performing a comprehensive surface assessment. Look for any signs of damage such as cracks, unevenness, or structural weakness. Your substrate must be structurally sound and capable of supporting the weight of the travertine tiles. Check for:
- Level and flat surfaces
- No significant dips or raised areas
- Solid structural integrity
- No moisture or water damage
As the Ceramic Tile Foundation emphasizes, the quality of your tile work depends entirely on what lies underneath. A poorly prepared surface will compromise the entire installation.
If working on concrete, repair any cracks or holes using appropriate patching compounds. For wood surfaces, ensure you have a sturdy cement backer board installed. For existing tile surfaces, you may need to apply a layer of thinset mortar to create a perfectly smooth base.
Pro Tip: When in doubt about surface preparation, consult a professional. Proper preparation saves time and prevents costly future repairs.
Once your surface is fully assessed and prepared, you are ready to move forward with your travertine tile installation with confidence. The next step involves selecting and mixing the right mortar for your specific surface type.
Discover our guide on tile installation techniques to help you navigate this exciting home improvement project.
Step 2: Select and Arrange Travertine Tiles
Selecting and arranging your travertine tiles is an art form that requires careful consideration and strategic planning. This step will transform your space from ordinary to extraordinary.
As recommended by the Ceramic Tile Foundation, pay close attention to color blending. Tiles from different packages should display consistent color ranges and match your approved samples. If the tiles do not appear uniformly blended, consult your supplier about replacement or site blending.
When selecting tiles, consider these key factors:
- Overall color palette of your space
- Natural variations within the travertine stone
- Size and shape of tiles
- Pattern and layout design
- Room dimensions and architectural features
Discover installation layout ideas for marble and travertine that can inspire your design approach. Different laying patterns can dramatically impact the visual perception of your space.
Professional installers recommend creating a dry layout before permanent installation.
 This involves arranging tiles on the floor without adhesive to visualize the final look. Check for color transitions, symmetry, and how tiles interact with room features like corners and edges.
According to the Ceramic Tile Foundation, certified tile installers emphasize the importance of precision and time management during this stage. Take your time to plan and arrange tiles thoughtfully.
Pro Tip: Always order 10% extra tiles to account for cuts, breakage, and future repairs.
Once you have selected and preliminarily arranged your travertine tiles, you are ready to begin the actual installation process. The next step involves preparing your chosen adhesive and starting the precise placement of each tile.
Step 3: Apply Adhesive and Lay Tiles Precisely
Applying adhesive and laying travertine tiles demands precision and patience. This critical step transforms your carefully prepared surface into a stunning natural stone masterpiece.
According to the Ceramic Tile Foundation, investing in premium quality bonding materials is crucial. The additional cost is minimal typically amounting to just pennies per square foot yet significantly impacts your installation’s long term quality.
Begin by selecting the appropriate thinset mortar for travertine. Look for a high quality modified thinset that provides strong adhesion and flexibility. Mix the mortar according to manufacturer instructions ensuring a smooth consistent texture without lumps.
Check out our guide on choosing the right tools for your tiling project to ensure you have all necessary equipment for precise application.
Apply the thinset using a notched trowel held at a 45 degree angle. Spread evenly creating uniform ridges that will support the tile. Work in small sections to prevent the mortar from drying before tile placement.
Carefully place each travertine tile using gentle pressure and a slight twisting motion. Use tile spacers to maintain consistent gaps and ensure perfect alignment. Check level and adjust immediately while the mortar is still workable.
As the Ceramic Tile Foundation emphasizes, certified installers focus on precision and time management during this stage. Move methodically and deliberately.
Pro Tip: Clean excess mortar from tile surfaces immediately to prevent hardening and potential staining.
After laying all tiles, allow the installation to set undisturbed for the recommended curing time.
Step 4: Grout and Seal Travertine Surfaces
Grouting and sealing your travertine tiles represents the final transformative step that protects and enhances your beautiful natural stone installation. This process ensures longevity and maintains the stunning aesthetic you have carefully crafted.
According to Fabritec, applying a sealer requires meticulous attention to detail. Before beginning, ensure the surface is thoroughly cleaned and completely dry. Any residual debris can interfere with the sealer’s ability to adhere properly, potentially causing uneven coverage.
Start by selecting a high quality penetrating sealer specifically designed for natural stone. Choose a product that offers robust protection against stains and moisture while preserving the natural beauty of the travertine.
Explore our guide to protecting travertine surfaces to understand the best approaches for long term maintenance.
Apply the grout carefully using a rubber float held at a 45 degree angle. Work the grout diagonally across tile joints to ensure complete coverage. Remove excess grout with a damp sponge before it fully dries to prevent residue on tile surfaces.
Once the grout has cured completely wait the manufacturer recommended time allow the surface to dry thoroughly. Then apply the sealer using a clean microfiber cloth or low nap roller. Work in small sections using smooth even strokes to guarantee uniform coverage.
As the Ceramic Tile Foundation suggests investing in premium materials pays off. A quality sealer might cost slightly more but provides superior long term protection.
Pro Tip: Apply sealer in a well ventilated area and wear protective gloves to prevent skin contact.
After sealing allow the surface to cure completely before resuming normal use. Your travertine installation is now protected and ready to showcase its natural elegance for years to come.
Step 5: Inspect and Finalize Tiling Installation
The final step of your travertine tile installation involves a meticulous inspection to ensure your hard work results in a flawless finished surface. This critical review confirms the quality and precision of your entire project.
According to the Ceramic Tile Foundation, you must thoroughly examine the substrate and installation area for compliance with performance requirements and industry standards. This means conducting a comprehensive visual and tactile assessment.
Begin by checking tile alignment. Walk across the surface carefully and look for any tiles that appear higher or lower than surrounding tiles. Use a long level to verify overall flatness and detect any slight variations in height.
Check out our guide to essential tiling terms to better understand professional installation language and standards.
Inspect grout lines for consistency in width and depth. Ensure they are clean clean and free from debris or excess material. Look for any areas where grout might need touch ups or additional sealing.
Test the tiles by gently tapping with a rubber mallet. Listen for any hollow sounds that might indicate improper adhesion. Press lightly on random tiles to confirm they are securely bonded to the substrate.
As the Ceramic Tile Foundation emphasizes professional installers focus on producing high quality long lasting installations using proven best practices.
Pro Tip: Photograph your completed installation from multiple angles. This documentation can be helpful for future maintenance or potential warranty claims.
Your travertine tile installation is now complete. Take a moment to appreciate the stunning transformation you have achieved through careful planning and precise execution.
![]()
Here’s a comparison of key steps in travertine tile installation:
| Step | Main Actions | Key Considerations |
|---|---|---|
| Assess & Prepare Surface | Inspect for damage Ensure levelness Clean thoroughly |
Firm, dry, clean substrate Repair cracks No moisture issues |
| Select & Arrange Tiles | Blend colors Create dry layout |
Match color samples Plan pattern Order extra tiles |
| Apply Adhesive & Lay Tiles | Spread thinset Place tiles Use spacers |
Use quality adhesive Work methodically Keep surfaces clean |
| Grout & Seal | Grout joints Clean tiles Apply sealer |
Use appropriate sealer Allow curing Protect against stains |
| Inspect & Finalize | Check alignment Test adhesion Review grout |
Ensure flatness Consistent joints Document results |
Transform Your Travertine Tiling Ambitions into Reality
Mastering travertine tile installation requires careful surface preparation, precise tile arrangement, and the right materials to achieve lasting beauty. If you are committed to flawless grout lines, perfect adhesion, and vibrant color blending, quality natural stone is the foundation you cannot afford to overlook. At Surfaces Galore, we understand the challenges of working with premium travertine—from selecting authentic stone that matches your design vision to providing durable products that stand the test of time.

Explore how our collection of luxurious travertine tiles and mosaics can elevate your project with timeless elegance and durability. Start your journey today by visiting Surfaces Galore to view our exquisite natural stone options. For design inspiration and expert tips, check out installation layout ideas for marble and travertine and learn how to choose the right tools for your project at how to choose the right tools for your tiling project. Don’t wait to create stunning travertine surfaces that reflect your style and craftsmanship. Visit us now and bring your vision to life with confidence.
Frequently Asked Questions
How do I prepare the surface for travertine tile installation?
To prepare the surface for travertine tile installation, ensure it’s firm, dry, and clean, with no oil or wax. Inspect for cracks or unevenness and repair any damage before laying tiles.
What type of adhesive should I use for travertine tiles?
Use a high-quality modified thinset mortar for strong adhesion and flexibility when laying travertine tiles. Mix according to package instructions to achieve a smooth, lump-free consistency before applying.
How can I ensure the tiles are arranged correctly before installation?
Create a dry layout by arranging the travertine tiles on the surface without adhesive. This will help you visualize color blending and pattern alignment, allowing adjustments before final installation.
What are the steps to grout and seal travertine tiles after installation?
To grout and seal travertine tiles, first apply grout diagonally across joints and remove excess with a damp sponge. Once the grout cures, apply a high-quality penetrating sealer to protect the surface from stains and moisture.
How can I check if my travertine tiles are correctly installed?
Inspect your tiles for proper alignment and consistency in grout lines. Check for securely bonded tiles by gently tapping them; any hollow sounds may indicate improper adhesion that needs to be addressed.
What should I do if I notice uneven tiles after installation?
If you notice uneven tiles, use a long level to assess the surface flatness. If needed, you can carefully remove the affected tiles and reapply them with additional adhesive, ensuring the surface is level before setting them again.
Leave a comment